Review and verify an invoice
Go through the checks, fix what needs it, and verify.
Also known as: approve · check invoice · confirm invoice · sign off · accept · ok an invoice · tick off · finalise · finalize · approve bill
Verifying an invoice is your way of saying “this was read right,” so you can trust the prices, recipe costs and spend that come from it. Maitaki checks every invoice first, so most of the time you’re confirming what it already found.
Open the invoice
- Tap Purchases, then the Invoices tab.
- Tap Review to see only the invoices waiting for you.
- Tap an invoice. Ready to verify means every check passed. To review or N alerts means something needs a look.
You can also work from the Inbox. When invoices are waiting, its summary says how many there are to check. Tap Start to go through them one after another.
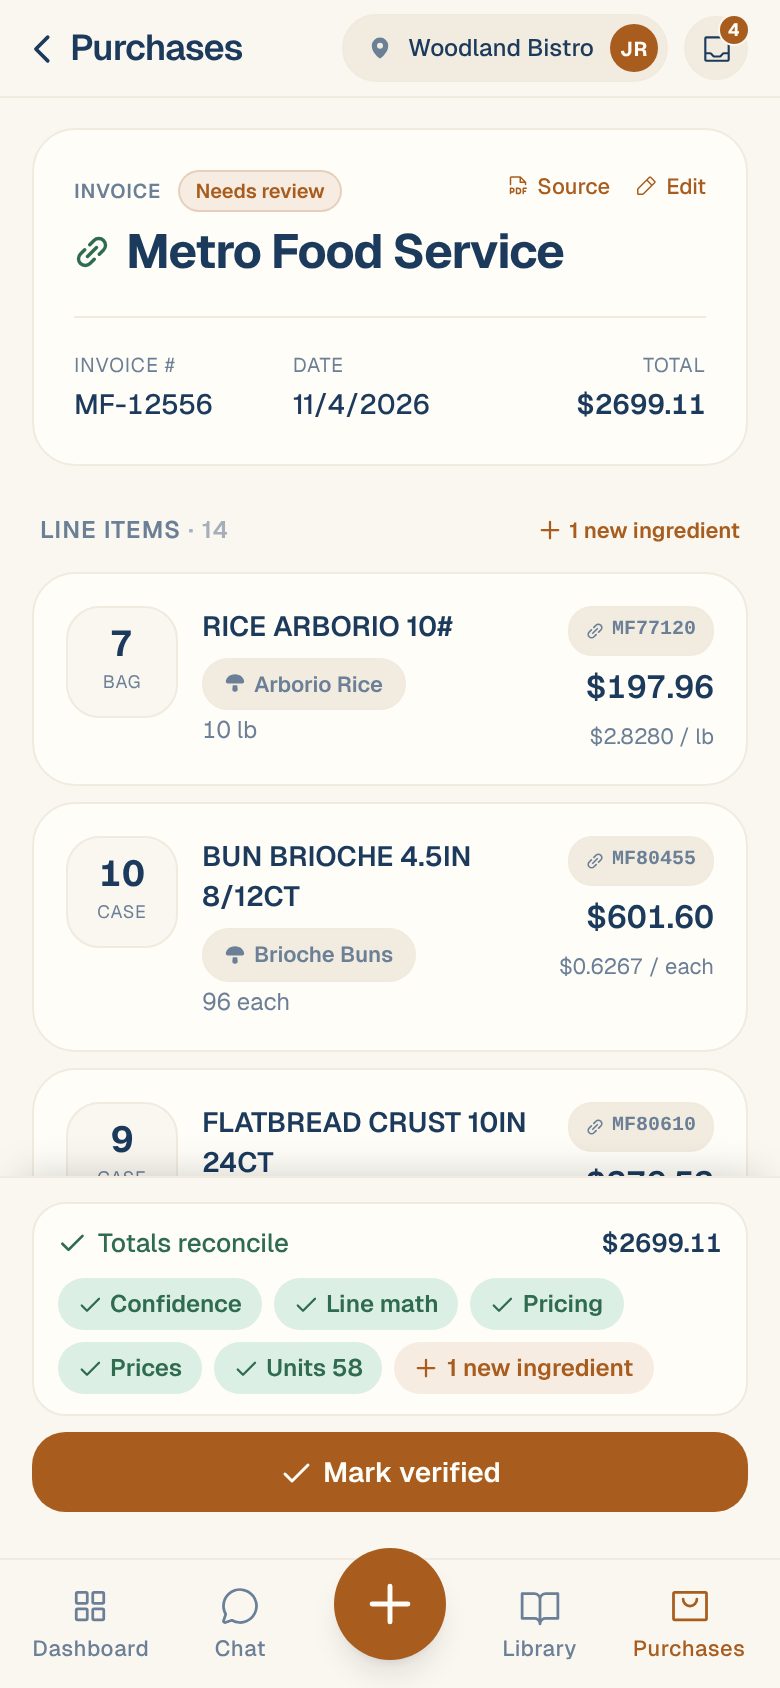
Read the checks
At the bottom of the invoice you’ll see the money check first: Totals reconcile with the total, or Lines $A vs $B with the difference. Under it are the check chips. Green chips passed. Red ones, like 2 prices to check or 1 line can’t be priced, need you.
To see only the lines behind a problem, tap a filter chip above the lines, such as Can’t price, Check price, Math or Low confidence. Tap All to see every line again.
Each check is explained in plain words in What “Needs review” means.
Fix what needs it
Tap a line to open it. From there you can correct the quantity or price, set the pack, or change the ingredient. Once a line is fixed, its chip disappears and the check turns green.
- A line marked Needs pack or Unit doesn’t convert: see Fix “Can’t price” and “Needs pack” lines.
- A line marked Check price: see Handle “Price looks off”.
- A line marked qty × price ≠ amount or Low confidence: see Fix a line on an invoice.
- A total that doesn’t match: see When the lines don’t add up to the total.
If the button says Resolve vendor to verify, Maitaki couldn’t tell who the invoice is from. Tap Edit at the top and pick the vendor. See Change an invoice’s vendor, number, date or total.
Keep the original open while you check. On a phone, tap Source at the top of the invoice. On a computer, the scan sits to the left of the lines. See See the original photo or PDF.
Verify it
- Tap Mark verified at the bottom. If some checks are still open, the button says how many, like Mark verified · 2 checks.
- The Verify invoice sheet lists every check. Passed checks are already ticked.
- For each check that isn’t ticked, either tap Review to jump to those lines and fix them, or tap Looks fine if it’s right as it is. When you’re done fixing, tap Done · back to verify to return to the sheet.
- When every check is ticked, tap Verify invoice.
You’ll see Verified with the total, and added to your costs. If you were working through several invoices, the next one opens.
Changed your mind about a Looks fine? Tap Undo next to You marked this fine before you verify.
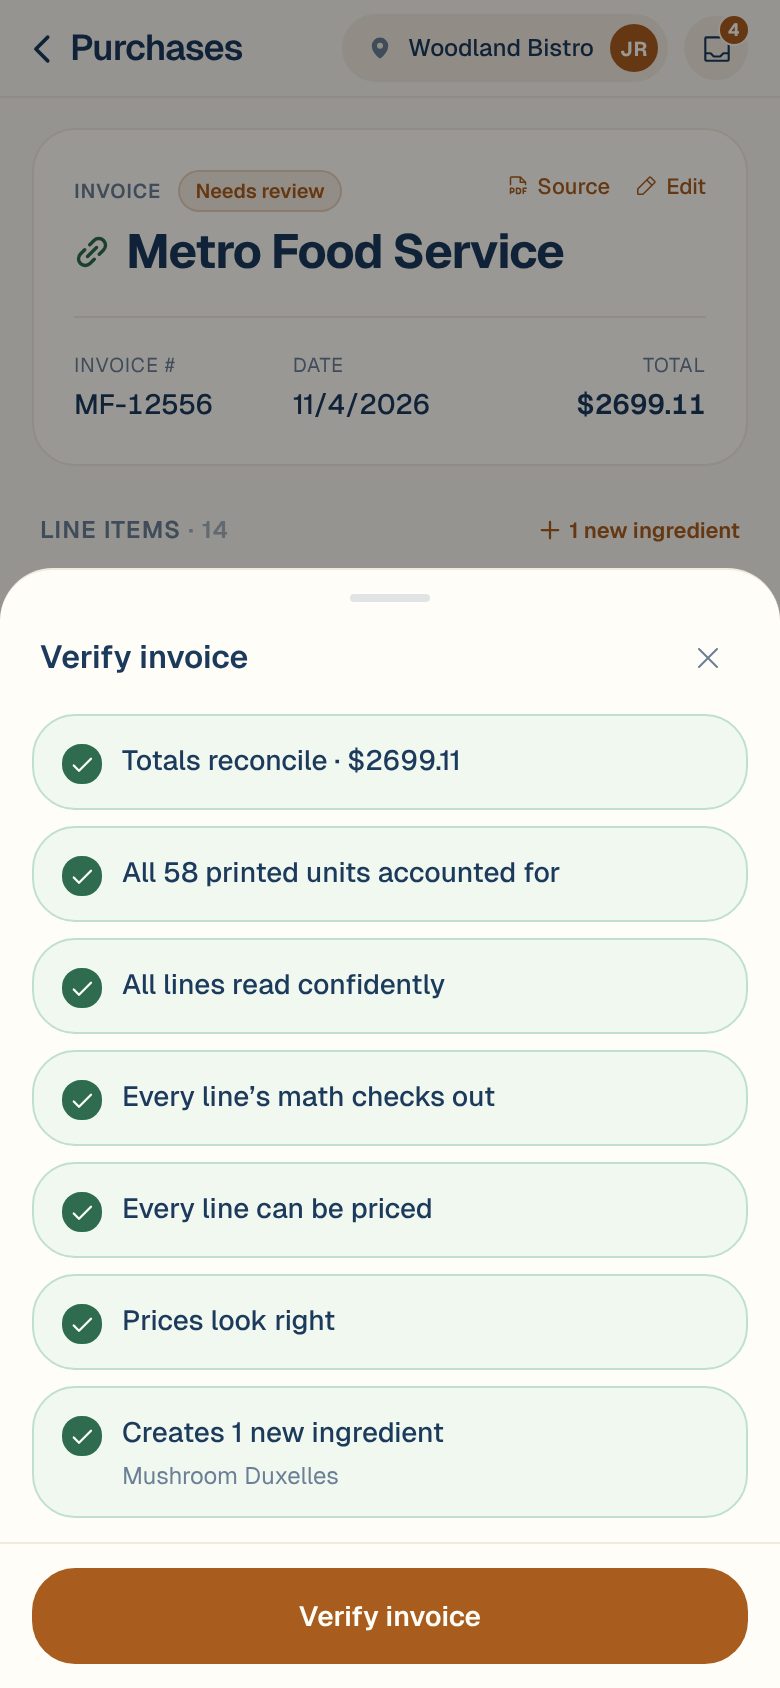
New ingredients
A line that isn’t linked to an ingredient doesn’t stop you verifying. When you verify, it becomes a new ingredient. The sheet shows Creates N new ingredients with their names, so nothing is added without you seeing it. If a line should go to an ingredient you already have, link it first. See Link a line to the right ingredient.
Common questions
Can I verify straight from the Inbox?
Yes, when the invoice is ready. Open it in the Inbox and tap Mark verified. If it says how many new ingredients it adds, those are created when you tap it. If something needs fixing, tap Open invoice and fix it there.
The invoice says "Possible duplicate". Can I still verify it?
Not until you’ve compared it with the one already on file. Tap View to open that one. If they’re different bills, tap Not a duplicate — verify anyway. If they’re the same, delete this copy. See Duplicate invoices.
I have lots of invoices that are ready. Do I open each one?
No. You can select them all and verify them together. See Verify many invoices at once.
I don't see Mark verified.
You have Viewer access, which can look at invoices but not change or verify them. Ask an Owner or Admin to change your role. See Roles: who can do what.