Add a location
Set up your next restaurant in Maitaki. Each location has its own sales, invoices, team and settings.
Also known as: new store · second restaurant · add branch · add kitchen · another site · new venue · open new restaurant · multi-site · outlet · add shop
Each location in Maitaki keeps its own sales, invoices, team, labor and settings. Adding one takes a name; you set up the rest from its settings page.
Add it
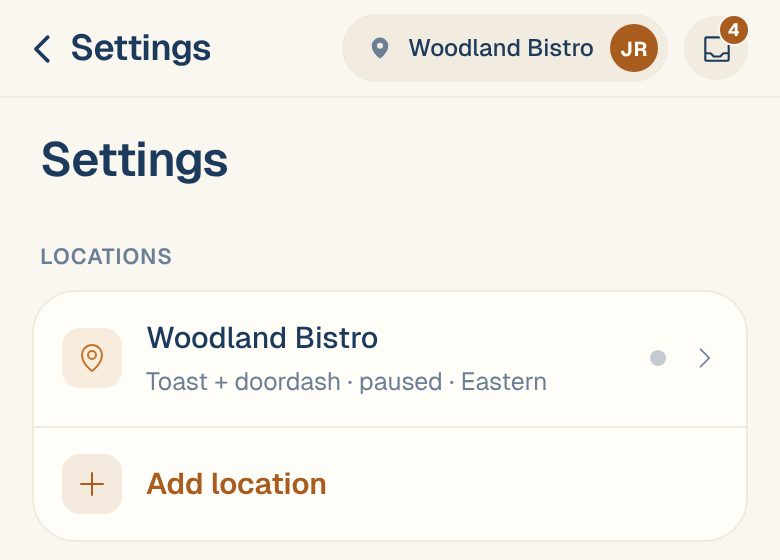
- Open the account menu (your location and avatar, top right on a phone; bottom left on a computer) and tap Settings.
- Under Locations, tap Add location.
- Type the Location name.
- Tap Add location.
The new location shows in the Locations list in Settings, and in the account menu, where you can switch to it.
Set it up
Tap the new location in Settings to open its settings page. Start with these:
- Name & business day: check the Timezone, which starts as Pacific time, and when the Day ends at. See Set your business day and timezone.
- Sales: connect its POS or card terminal. See Connect your Toast POS or Connect your Clover POS.
- Email for invoices: give it its own address for invoices. See Get an email address for invoices.
- Team at this location: invite the people who work there. See Invite someone to your team.
Who can open it
Admins, the Owner, and anyone whose access covers All locations can open the new location straight away. People limited to certain locations can’t, until you give them a role there. See Change someone’s role or locations.
Common questions
I don't see Add location.
Only Admins and the Owner can add locations.
I made a location by mistake.
Archive it. See Archive a location.
How do I rename a location?
Tap it in Settings, then Name & business day. Change the Location name and tap Save changes. Managers can do this too.